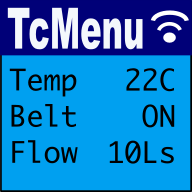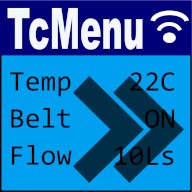
You can choose to use tcMenu embedded menu designer as an initializer. This means that you can add new menu items without having to rebuild your project. This makes it much easier to use tcMenu.
In the initializer case, the intended workflow is to create a project that works with a given display driver and input configuration and then manage the menu yourself. In this case you only go back into the menu designer if your hardware changes, or you need a different plugin. We'll discuss how this works below.
NOTE: Initializer mode is intended for intermediate to advanced users who want to manage their menu items in code, and you must have a good understanding of C++ and builder syntax. Otherwise, choose the round trip menu development option.
Pros and cons
Pros:
- Manage menu items yourself in code without regenerating the project.
- Allows for easier integration with existing projects.
- Only rebuild your project if the code changes.
Cons:
- Requires more manual management of the menu and an understanding of C++ builders.
- Requires one off allocation during the setupMenu() method (only called once during setup).
- Trades off the ability to regenerate the menu in the designer.
Starting in initializer mode
To start a new project choose the Start Project page from the page header. Because we are going to take over the menu structure ourselves, we need to choose options that allow for this, below is an example of the start project page:
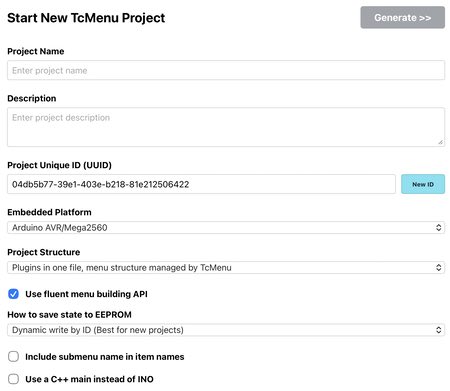
Each field is described below along with the recommended settings for initializer mode:
- Project Name and Description: Fill in as appropriate for your project, the output directory and skeleton will be named based on the project name without spaces.
- Project Unique ID: This is a generated UUID for your project. You can regenerate a different one if you need to/
- Embedded Platform: Choose the closest platform for your hardware.
- Use Fluent menu building API: Ensure this is ticked for the round trip mode. This is the most important flag, it enables the new menu build mode.
- Project Structure: Should be set to "Plugins in one file, menu structure in sketch". This puts all plugins and boilerplate into a single set of files. Leaving you with far fewer files to manage. It also puts the menu builder code into the sketch.
- How to save to EEPROM: Should be set to dynamic write by ID. This uses more space but means you don't need to work out spacing yourself.
For the other options, up to you, whatever works best. Once finished, press "Generate >>".
Opening an existing project to adjust plugins
To open an existing project, either to switch it to initializer or for adjustment, you can drag and drop the emf file into the menu edit page. This will load the project into designer and allow you to adjust the plugins as needed. When you drag an EMF file into the menu designer, it assumes initializer mode, and writes out a zip file.
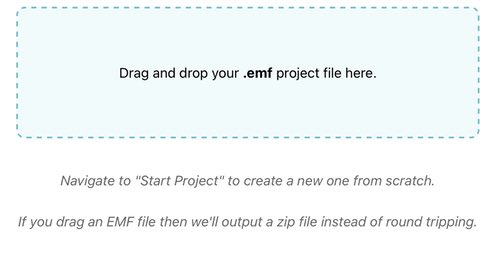
If it is an older EMF file from the pre-turbo era, you may need to adjust the project options to make it suitable for initializer mode. In this case select the root option in the project menu tree, and that will show the project options. Change the options to match the ones described in the start project flow above.
Setting up an initial menu structure
Although in initializer mode the menu structure is under your control after the first generation run, it is recommended to use the designer to create the initial structure. Once you have created the initial menu structure, you can modify it as needed in your sketch/main file.
See editing the embedded menu structure for more details.
Multi-language menu support works differently in initializer mode; the main difference is that you're not round-tripping through designer. When the source properties files are edited, we need to use a provided python script in order to rebuild the header file after changes. You can read more about enabling multi-language menu support.
Generating the code
Once you've dealt with the project options and prepared the menu structure in designer then you're ready generate the code. Because we chose initializer mode the code generator will output a zip file that can be expanded and loaded into your IDE of choice such as Arduino IDE/PlatformIO/CLion.
See generating embedded menu project code for more details.
Going forward in initializer mode
In initializer mode, the menu code is in your sketch, and you take control of the menu structure manually after the first generation run. Effectively, unless your hardware or plugins change, you'd not use designer again. See the page that documents using the TcMenuBuilder to generate menu structures.
There's a full discussion of the various EEPROM save modes including the recommended Dynamic by ID mode.
In your sketch/main file the code generator will create function void buildMenu(TcMenuBuilder& builder) and this will contain the menu structure. This function is called from setupMenu() and is responsible for initializing the menu. You can modify this function to add or remove menu items as needed, it will not be regenerated unless you delete the function.
Assuming you selected All-in-one file mode then the plugins will be combined with the <project>_menu.cpp/h files further reducing the noise in the project directory.
These may be of interest
- Similar - Embed Control developer version for controlling and monitoring Arduino
- Similar - Control embedded menu application from browser - embedCONTROL.js
- Similar - Designing menu layouts using web designer
- Similar - Menu Code generation for Arduino, PicoSDK, mbed
- Similar - Using menu designer to fully manage your menu structure

Want to let us know about something?
- If this is a library documentation page, raise a PR on the documentation site.
- Open a discussion on the Community channels
- Contact us for problems or improvements on the main site.
Table of contents
Supporting us
We maintain several popular embedded projects and work hard to make them even better. If you're looking for commercial services, please do consider us.
Alternatively, you can buy us a coffee to say thanks.
Sharing links
Learn about TcMenu
We build and maintain an embedded menu designer and framework that works on many platforms.