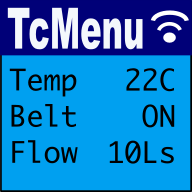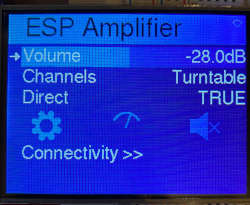
In this guide we show how to use the Adafruit_GFX library to renderer menu items with tcMenu. This rendering driver for Adafruit_GFX is built into the core menu designer download, meaning it's available out of the box.
The Adafruit_GFX library supports a lot of different displays, with very different capabilities. Some are monochrome with an in-memory buffer; whereas others are high resolution colour displays that are not buffered in memory. In order to make our renderer as generic as possible it supports both of these capabilities through configuration. It's worth reading this guide fully so that you understand how we manage the various capabilities.
Before proceeding, you'll need to make sure you've installed both the Adafruit_GFX core library and the library that is compatible with your display. Also, I'd recommend taking a read through the Adafruit_GFX library documentation if you're not familiar with the library already. We'll also assume you've got a menu structure already prepared in the menu designer UI.
Related documentation:
Configuring the rendering for your display
First, ensure your menu structure is saved and then choose Code -> Generate Code from the menu. Once the code generation dialog appears, you can change the display renderer by clicking on the image to the left of the renderer.
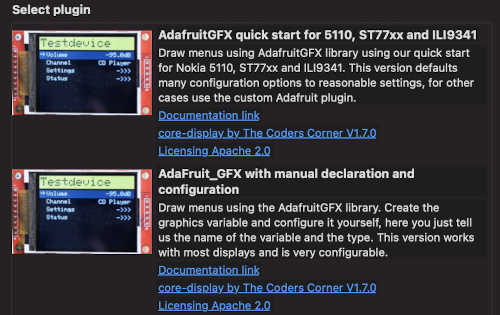
There are two possibilities for Adafruit_GFX based displays, the first and easiest is the "quick start" option, it supports a few common displays (ST7735, ST7789, ILI9341 and Nokia 5110), it creates all the variables and initialises the display for you. We'll refer to this option as quick start.
If you need full control over the display variable, and all the configuration options, then you choose the "Manual Declaration" option, in which case you prepare the variable yourself, and just tell tcMenu the name and type of variable you've created. We'll refer to this as "Manual Configuration".
Quick Start for ILI9341, ST7735, ST7789 and Nokia 5110
If you choose quick start, then the code generator will create the variable, and initialise the display on your behalf. It is obviously far less configurable than manual option, but easier for a few select display. It looks like there are more options than for the manual case, but that is because we will create everything on your behalf.
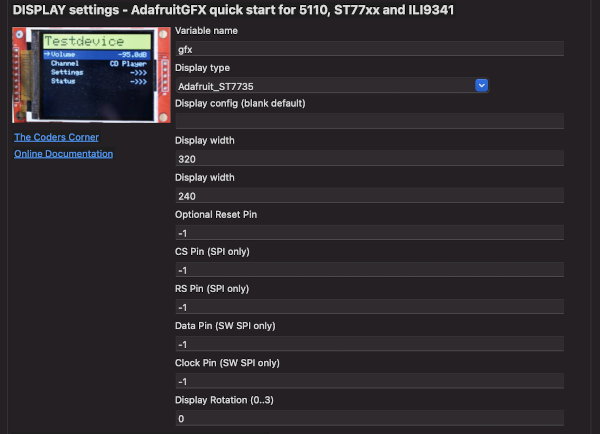
Variable Name
The graphics variable that the generator will generate on your behalf, it will be exported with this name to use in your own code.
Display Type
We try and support as many displays as we can with quick start, and they will vary from time to time. If your display is not listed, use the manual configuration option instead.
Display Width & Height property
Set these to the hardware width and height of your display
Reset pin (optional)
You can configure a reset pin if your display requires it. Either set to a pin value or -1 for none.
CS pin (for all SPI cases)
Set this to the chip select (CS) pin for the display. All displays in this category need this.
RS / DC pin (for all SPI cases)
Set this to the pin for Register select or Data/Command. All displays in this category need this.
Data pin and clock pin (software SPI)
Only set these two pins to a value other than -1 if you want to use software SPI. This is much slower than hardware SPI, so do not use on bigger displays.
Display rotation
You can specify the initial rotation of the display as a value from 0 to 3.
Updates per second
How many times the menu structure should be scanned for changes and redrawn if needed. TcMenu tries to minimise redraws where reasonably possible.
Manual Configuration
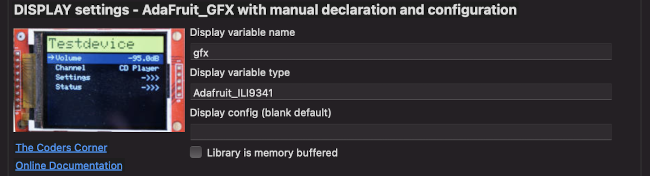
When you choose the manual configuration option, you need to create the display variable in your sketch, and make sure it is fully initialised before calling setupMenu in your sketch.
Display variable property
In this case you simply create a global variable in your sketch that creates the graphics object. You make sure that the library has been initialised before calling setupMenu() in your sketch. Set this value to the name of the global variable.
Display variable type property
There are many types of display supported by this library, therefore you just provide the variable type that you declared. For example Adafruit_SSD1306.
Buffered display properties
Here you can both enable and set the size of the buffer. See Adafruit display performance improvements
Updates per second
How many times the menu structure should be scanned for changes and redrawn if needed. TcMenu tries to minimise redraws where reasonably possible.
Pre-tested displays with Adafruit_GFX
Each of the display drivers shown below is fully tested with every release of tcMenu. Many other displays will probably work with this renderer, but we've not got one to hand to test.
Using the menu library with Nokia 5110
The library for this display is both memory buffered and monochrome. There is a complete example menu packaged with the core tcMenu library. This example was tested on MEGA / AVR with a UipEthernet remote. However, the concepts are generally applicable. Link below takes you to the source on github.
[https://github.com/TcMenu/tcMenuLib/tree/main/examples/nokia5110]
Using the menu library with OLED SSD1306
The library for this display is both memory buffered and monochrome. Again there is a complete example menu packaged with tcMenu. This example was tested on both ESP32 and ESP8266, but the concepts are generally applicable to any processor. Link below takes you to the source on github.
[https://github.com/TcMenu/tcMenuLib/tree/main/examples/esp8266WifiOled]
Using the menu library with color TFT's - ILI9341 and ST7735
Both ILI9341 and ST7735 are high resolution, color displays with built in memory. Therefore, these display libraries are unbuffered on the Arduino side. In order to improve performance where memory allows we support drawing menu items into a 2-bit (4 color) area first in RAM, then using a high performance blit function to transfer the data. Using this buffer the performance is excellent.
These may be of interest
- Similar - Dark mode themes for all display sizes.
- Similar - Monochrome themes for rendering menus onto OLED/5110.
- Similar - Color themes for all display sizes.
- Similar - TcMenu - Rendering menus to LCD using LiquidCrystalIO library
- Similar - Using SSD1306 to generate a Uno / low memory multi level OLED menu

Want to let us know about something?
- If this is a library documentation page, raise a PR on the documentation site.
- Open a discussion on the Community channels
- Contact us for problems or improvements on the main site.
Table of contents
- Configuring the rendering for your display
- Quick Start for ILI9341, ST7735, ST7789 and Nokia 5110
- Variable Name
- Display Type
- Display Width & Height property
- Reset pin (optional)
- CS pin (for all SPI cases)
- RS / DC pin (for all SPI cases)
- Data pin and clock pin (software SPI)
- Display rotation
- Updates per second
- Manual Configuration
- Display variable property
- Display variable type property
- Buffered display properties
- Updates per second
- Pre-tested displays with Adafruit_GFX
Supporting us
We maintain several popular embedded projects and work hard to make them even better. If you're looking for commercial services, please do consider us.
Alternatively, you can buy us a coffee to say thanks.
Sharing links
Learn about TcMenu
We build and maintain an embedded menu designer and framework that works on many platforms.