Making a nice case for an Arduino board can range from the simplest possible case, a piece of plywood the right size, with a few holes to mount the board, right through to an intricate box with closing lid etc. This one probably falls in the middle somewhere.
Why another Arduino board holder you ask? Now that my son has taken up the same hobby as me, having started with scratch and a bit of python, he fancies his hand at Arduino. What better reason to build a new case?
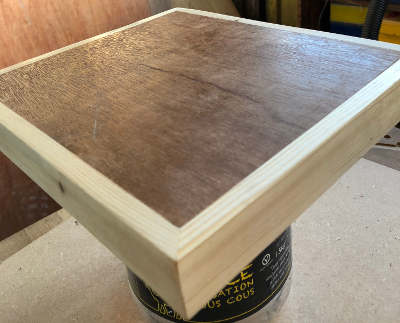
This time, I used hardwood ply for the centre, but a real wood outer, to make it look a little nicer. If you want to try building this case too, I've included complete instructions below.
Marking out and Cutting
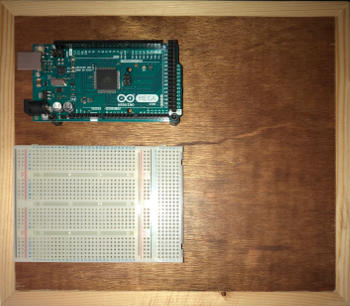
So for this project, not only did I want to hold both the Arduino and the breadboard together, but additionally I wanted space at the side to eventually mount some additional boards. To work out what size you need, I recommend putting all your components on a piece of paper and measuring out the space needed. This board is 250mm x 220mm but there's no perfect size!
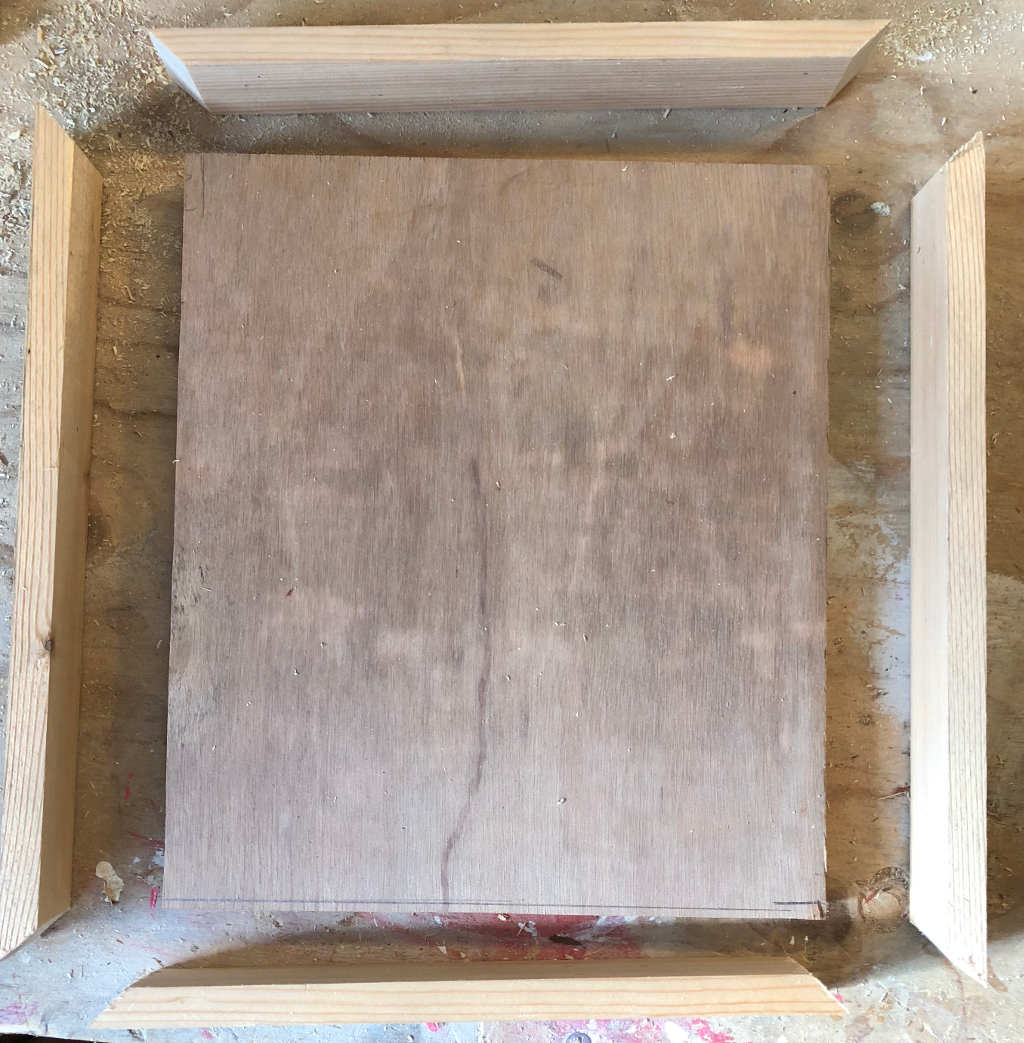
At this point transfer those measurements onto a piece of plywood (15mm or 18mm) and cut it to size. Make sure the plywood is absolutely square at the edges, as otherwise the mitres won't look right (I usually use a table saw with a good fence for this, then confirm with a square).
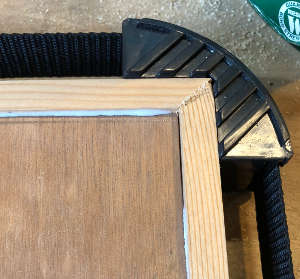
Now cut 4 outer pieces of fairly thin (I used 10mm x 25mm) wood with each corner mitred (as per diagram below). These will form the outer part of the case; they need to be cut very carefully to size as any gaps will show. I usually cut a bit too big and then cut again accurately after checking it in position. To cut this I usually use a chop saw set at 45 degrees.
Test fitting and gluing
Now all the wood is cut, assemble it loosely to make sure it all fits. At this point get your preferred clamps and make sure it clamps up well. I like to use the belt clamp for this. Make sure the fit is tight everywhere, there should be no gaps.
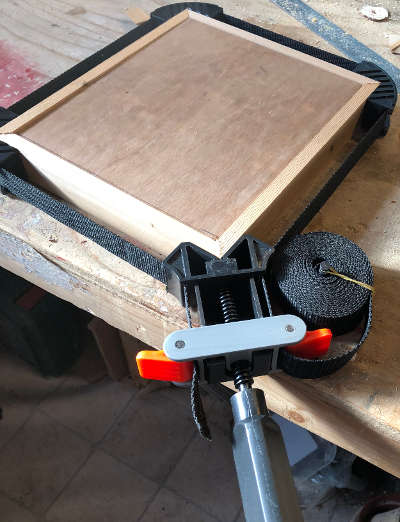
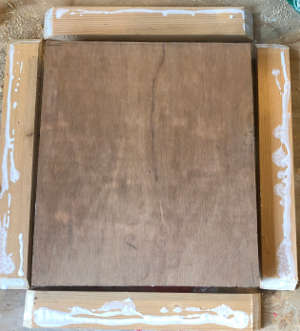
Once you're happy with the fit, then glue up the sides and the mitres and re-clamp it. Personally, I like to leave the mitered edge pieces a little proud, and sand them down later. Lastly, remove any excess glue at this point the leave to dry for a few hours.
Sanding and finishing
Starting with a rough sandpaper, sand down the board until everything is level. I normally start with either a 60 or 80 grade sandpaper (carefully) using a belt sander, then switching to orbital and hand sanding down to 120 grade, then lastly 240 grade. Don't forget to use an extractor (or do it outside) and a mask when sanding.
To finish the board, I sprayed it with three coats of matt clear spray on lacquer. This gives a nice and deep finish without too much shine a glare. I would spray outside, and wear the best mask that you have while doing so. Follow the instructions on the spray can. Alternatively, use an Acrylic varnish with a foam brush, either will give excellent results.
Mounting the components
Lastly, we need to mount the Arduino board and the breadboard onto the finished holder. To mount the Arduino, we need to mark out and drill four holes for mounting. I do this using the board itself as the template, marking each drill point with a pen. I usually drill an 8mm hole at each point to fit in the 4 mounting bolts.
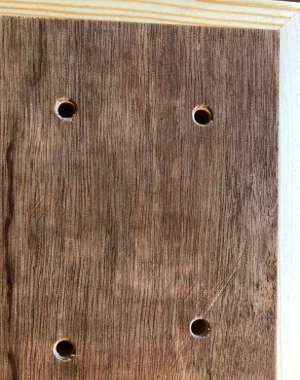
Use M2.5 bolts to attach the Arduino board to the holder, with a PCB spacer to keep the board slightly away from the holder.
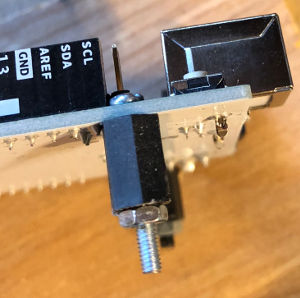
Now, test fit the Arduino board with the bolts attached, the bolts should go into the holes, then put glue into each hole and seat the board. If you use a glue gun, you'll only have to wait a minute while it sets.
Last of all, the breadboard is usually glue backed, peel off the sticker and carefully place the breadboard where you want it. This glue is permanent, and cannot be moved once stuck.
These may be of interest
- Similar - Hand-built router table for the workshop
- Similar - Building a holder for my Arduino board
- Similar - Building a pair of Troels Gravesen\"s Jensen ER speakers
- Similar - Building a pair of Seas Mimir design speakers.
- Similar - Orbit, a high performance DIY turntable.

Want to let us know about something?
- If this is a library documentation page, raise a PR on the documentation site.
- Open a discussion on the Community channels
- Contact us for problems or improvements on the main site.
Supporting us
We maintain several popular embedded projects and work hard to make them even better. If you're looking for commercial services, please do consider us.
Alternatively, you can buy us a coffee to say thanks.
Sharing links
Learn about TcMenu
We build and maintain an embedded menu designer and framework that works on many platforms.
