Tomcat and most other Java JEE servers support role based security, form based authentication and SSL. These technologies are integrated into your web application declaratively. At first the configuration for this security can look a little daughnting but once understood it is actually not difficult to configure.
This article is split over several pages and requires an understanding of tomcat and how a JEE webapp is structured. Most of the article is structured towards tomcat, but if you use another application server, many of the concepts are the same.
Example web application layout
For the rest of this article we will assume we have a web application setup that has the following layout, and that all pages starting with secure have to be accessed by authenticated users. However, index.jsp and pages starting with notsecure do not need authentication. userProfile.jsp is a special case and has additional content for authenticated users.
    + index.jsp
    + secure
    |   + secure1.jsp
    |   + secure2.jsp
    + mixed
    |   + notsecure1.jsp
    |   + secure3.jsp
    |   + userProfile.jsp
    + WEB-INF
        + web.xml
We will build up the security model slowly. In the end we will have role based security, form based authentication backed onto a database security realm. Setting up SSL is covered by another article [coming soon].
One thing to understand about role based security is that you cannot directly make a user login, instead you simply direct the user at a "secured" page and they will be logged in automatically before the content is displayed.
Adding authentication to web.xml
In order to add role based security to our web-application, the first thing we need to do is edit web.xml, located in the WEB-INF directory. To start with the web.xml will look something like the file below:
<?xml version="1.0" encoding="UTF-8"?>
<web-app xmlns="http://java.sun.com/xml/ns/javaee"
           xmlns:xsi="http://www.w3.org/2001/XMLSchema-instance"
           xsi:schemaLocation="http://java.sun.com/xml/ns/javaee
      http://java.sun.com/xml/ns/javaee/web-app_2_5.xsd"
           version="2.5">
</web-app>
A word of warning before we continue, the web.xml document is validated, and items must appear in the right place, for example security data must appear after filters and servlet elements.
Below we start to add the declarative security, we create a role called manager (security-role), and then create a security-constraint that prevents unauthorised access to the secure resources. Within the security constraint element there are two children, web-resource-collection defines which pages are covered by this definition, and auth-constraint defines the role that will be applied.
<?xml version="1.0" encoding="UTF-8"?>
<web-app xmlns="http://java.sun.com/xml/ns/javaee"
           xmlns:xsi="http://www.w3.org/2001/XMLSchema-instance"
           xsi:schemaLocation="http://java.sun.com/xml/ns/javaee
      http://java.sun.com/xml/ns/javaee/web-app_2_5.xsd"
           version="2.5">
    <security-role>
        <role-name>manager</role-name>
    </security-role>
    <security-constraint>
        <web-resource-collection>
            <web-resource-name>management pages</web-resource-name>
            <url-pattern>/secure/*</url-pattern>
            <url-pattern>/mixed/secure3.jsp</url-pattern>
        </web-resource-collection>
        <auth-constraint>
            <role-name>manager</role-name>
        </auth-constraint>
    </security-constraint>
</web-app>
Above we used url-pattern elements to define the pages that were included in the constraint. Security constaints can use wildcards and below there’s more examples:
*.do- all requests ending in .do/somepage.htm- only the exact page /somepage.htm/secure/*- all pages under directory /secure
At this point you can run the application. However, if you click on any secure content you’ll get a HTML 403 error instead of the page. This is because we have not yet defined how to ask the user to authenticate with the server.
Types of authentication that are supported
What we did on the previous page was to add a constraint, this means that the server knows what pages are to be secured, it does not however know how to secure those pages. There are many ways to authenticate with the server, we will only cover a small number of those here
- Basic authenication - built into browser, not using SSL
- Form authenication - we provide pages, not using SSL
- Form authenication over SSL - we provide pages, Most secure using SSL/TLS
Adding basic authentication to tomcat
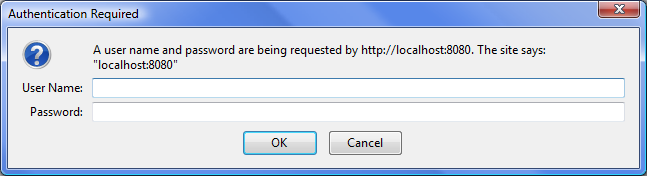
Basic authentication pops up a browser specific dialog to gather the users name and password, you’ve probably seen this dialog before as some sites use this for entering authentication details. It is not very secure, although the data is encypted it is not to the same standard as SSL. Below is an example dialog that a browser will show:
First lets try the easiest mode of security to setup - basic authentication. This will use the browsers own authentication dialog to request the user details. To set this up in tomcat is quite straightforward, and involves editing web.xml to add a login-configuration element as follows:
<?xml version="1.0" encoding="UTF-8"?>
<web-app xmlns="http://java.sun.com/xml/ns/javaee"
           xmlns:xsi="http://www.w3.org/2001/XMLSchema-instance"
           xsi:schemaLocation="http://java.sun.com/xml/ns/javaee
      http://java.sun.com/xml/ns/javaee/web-app_2_5.xsd"
           version="2.5">

    <security-role>
        <role-name>manager</role-name>
    </security-role>

    <security-constraint>
        <web-resource-collection>
            <web-resource-name>management pages</web-resource-name>
            <url-pattern>/secure/*</url-pattern>
            <url-pattern>/mixed/secure3.jsp</url-pattern>
        </web-resource-collection>
        <auth-constraint>
            <role-name>manager</role-name>
        </auth-constraint>
    </security-constraint>

    <login-config>
        <auth-method>BASIC</auth-method>
    </login-config>
</web-app>
But even now we will not be able to login, because we have not configured a user, as we have not yet set up a realm, right now we will use the default realm (user database), this realm can also be handy for development. If you are using tomcat, open tomcat-users.xml in the tomcat-home/conf directory and change to look like the example below.
Once tomcat is restarted you should be able to view the secure page using the credentials from the tomcat-users.xml file.
Changing to form based authentication
On the previous page we configured BASIC authentication, although easy to setup it is not customisable. However, FORM based security is more customisable as we provide the login page and also the login failure page. In order to continue we need to add two more files to the web application, we will call them login.jsp and login-fail.jsp.
+ login
| + login.jsp
| + login-fail.jsp
Form based security is configured with a login page and a page to display when the login failed, both of these pages should contain a form that submits to an action of j_security_check; which contain fields j_username and j_password for user and password. To be clear, tomcat gets a request to render a secure page, at this point it instead returns our login page. Here the users enters the details and submits the form (to the special URL above), at this point if successful they are redirected to the originally requested URL.
[login/login.jsp]
<html>
<head>
    <title>Please login to YourSiteName</title>
    <style type="text/css">
        input[type=text], input[type=password] {
            display: block;
        }
    </style>
</head>
<body>
<h1>Please login</h1>

<p>The page you have selected requires that you login to proceed.</p>

<form action="j_security_check" method="post" name="loginForm">
    <label for="user">User name:</label>
    <input id="user" type="text" name="j_username" size="20">

    <label for="password">Password </label>
    <input id="password" type="password" name="j_password" size="20">

    <input type="submit" value="Login">
</form>
</body>
</html>
And a suitable page to deal with login failures [/login/_loginfail.jsp]. We normally make this page a login page as well, so the user can re-attempt login:
<html>
<head>
    <title>Please login to YourSiteName</title>
    <style type="text/css">
        input[type=text], input[type=password] {
            display: block;
        }
    </style>
</head>
<body>
<h1>Please login</h1>

<p>The information you provided was incorrect, please check the credentials and try again.</p>

<form action="j_security_check" method="post" name="loginForm">
    <label for="user">User name:</label>
    <input id="user" type="text" name="j_username" size="20">

    <label for="password">Password </label>
    <input id="password" type="password" name="j_password" size="20">

    <input type="submit" value="Login">
</form>
</body>
</html>
We have not yet modified web.xml, so the next step is to change web.xml to use FORM based authentication. To do this we need to change the login-config section as follows:
<login-config>
  <auth-method>FORM</auth-method>
  <form-login-config>
    <form-login-page>/login/login.jsp</form-login-page>
    <form-error-page>/login/loginfail.jsp</form-error-page>
  </form-login-config>
</login-config>
Setting up a login secured by SSL./TLS
This is simply an extension of form based login. Just ensure that the form login pages require encryption in web.xml, then setup SSL/TLS within tomcat. In order to set up secure pages we need to make a couple of extra changes to web.xml. We need to add the following to the end of the
<user-data-constraint>
  <description>Needs SSL</description>
  <transport-guarantee>CONFIDENTIAL</transport-guarantee>
</user-data-constraint>
Setting up SSL is outside the scope of this article. Instead a starting point is here https://tomcat.apache.org/tomcat-7.0-doc/ssl-howto.html
These may be of interest
- Similar - Write XML with GroovyBuilder
- Similar - Wrapping JFreeChart as a Groovy builder
- Similar - Reading XML in groovy using XmlParser
- Similar - Generate an ATOM feed with GroovyBuilder
- Similar - Groovychart Bar chart with fixed colour

Supporting us
We maintain several popular embedded projects and work hard to make them even better. If you're looking for commercial services, please do consider us.
Alternatively, you can buy us a coffee to say thanks.
Sharing links
Learn about TcMenu
Learn about our rapid development framework TcMenu.
