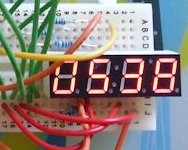
Arduino multiple digit, 7 segment display tutorial
On the previous page covering single digit displays, we dealt with driving one 7-segment digit. On this page we’ll use a multi-digit display and assume 4 digits. Just like single devices, multi-digit 7-segment displays have connections for A-G, DP and common, but they have a common pin for each digit, with one set of A-G and DP pins that are shared. So for a 4 digit display there will be four common pins.
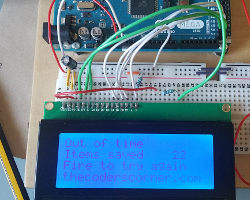
Wiring a 20x4 character display to an Arduino board
In this article I describe how to wire a 20x4 character display to an Arduino. I'm assuming you are using a regular 5V 8bit Arduino, if this is not the case this article will not work for you as you'll need voltage level converters. Most character based LCD displays use the same wiring, but I can't guarantee that all will be the same. If your display is the same it will look like the diagrams on this page and will have 16 pins.
Embed Control developer version for controlling and monitoring Arduino
There are two versions of Embed Control desktop UI, the first is built into TcMenu Designer and is aimed at developers and more advanced users that fully understand the menu tree, and may want to create customize views. The second version is a user-centric Embed Control packaged for App Stores and available from the App Store for that platform. This version will also support mobile devices running iOS and Android soon.
Control embedded menu application from browser - embedCONTROL.js
Instead of the desktop version, on Raspberry PIs you can serve a React.JS based single page web application that needs no installation. It works on a wide range of mobile phones, desktop and tablet devices. It is not supported in the Arduino or mbed environment directly at the moment. Using the deployed app To open the app, simply browse to the device on the configured host and port. For example if the device were 192.

Heltek Wifi kit 8 pin outs marked wrongly on some silk screens
I recently bought a Heltek Wifi kit 8 and noticed that although the board itself seems to be a good board the pin-outs, both online and on the silk screen of the board are wrongly specified. For example the silk screen shows SDA and SCL on non standard pins, but this is not the case as far as I can tell. To get this information, I’ve followed the schematic then proven these findings with in circuit testing to prove it.
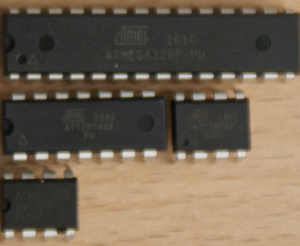
How the Arduino memory model works - for AVR
An overview of memory organisation All general purpose processors, be it Intel, ARM or AVR devices work by reading instructions from memory and executing them. They are generally based on one of two Architectures: Von-Neumann or Harvard. The vast majority of larger systems such as PC’s and mobile devices use Von-Neumann, but AVR processors in Arduino boards such as Uno and Mega use Harvard architecture. In a Von-Neumann processor there is one memory area, all program code, data, EEPROM and IO registers share a single memory space, with everything mapped to unique address ranges.
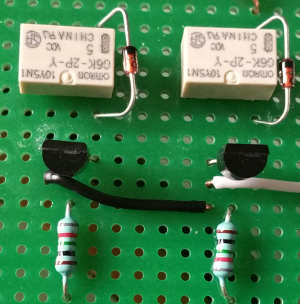
Detecting power loss in a power supply
There are times when your program needs to react to your device being turned off, for example to save the current state of an Arduino sketch to EEPROM before shutting down, or to disengage relays in a power module to ensure there is a clean shutdown. Usually, the power loss detector is designed as part of the power supply, so here I’ve put together an example power supply that we can study, note that this is not intended as an exemplar of power supply design, and is rather incomplete, but to serve as a crude model that we can study to see how to detect power loss.

Making an arduino board holder from ply & wood
Making a nice case for an Arduino board can range from the simplest possible case, a piece of plywood the right size, with a few holes to mount the board, right through to an intricate box with closing lid etc. This one probably falls in the middle somewhere. Why another Arduino board holder you ask? Now that my son has taken up the same hobby as me, having started with scratch and a bit of python, he fancies his hand at Arduino.
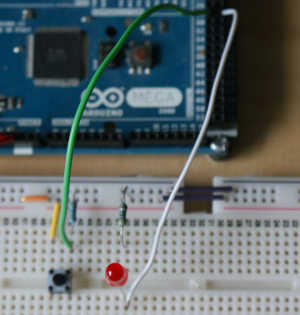
Arduino digital input and output tutorial
In this tutorial and accompanying youtube video (left), I discuss how Arduino inputs and outputs work. Arduino 8 bit boards are mainly based on Atmel AVR chips, in fact the Mega is named after the chip number AVR-Mega-2560. Outputs on the AVR chips are much more versatile than they first look, and the video covers this in detail. If you are using an Arduino pro or other 3V3 based Arduino, replace the 5V mentioned here with 3V3.

IO abstraction: the same code for pins, shift registers and i2c IO
When writing Arduino code that needs quite a few IO pins, you may need to expand the IO using a shift register or i2c expansion device such as the PCF8574. Up until now that meant significantly changing your code to use the new device. If you were using the io-abstraction library then you’d just set up a different type of IO. This library allows you to treat shift registers and i2c exapnders almost as if they were pins.

