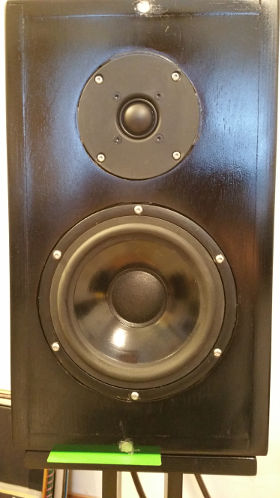
 For some time now, I've been running a pair of high quality bookshelf speakers based on the Seas Mimir design. Apparently, they are named after the Nordic god of Wisdom and Knowledge, I cannot disagree and with each listening I like them more and more. I've run them off both Roksan and Arcam amplification and I've really liked the sound from each.
Many people think that when building speakers, the most important thing is the drive unit, but there are many concerns: the quality of the crossovers, the cabinet construction and the stuffing used. Moreover, the stands they sit on and the position in the room that they are placed play a huge role too. In addition to this, the acoustics of the room play further into the equation. Over the parts of this article, I'll discuss the choices I made and my rationale for those choices.
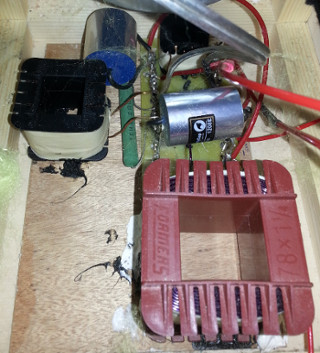
My first step was to download the plans (Seas Mimir design) and carefully read all the information provided. Once I was happy with what I was building I made a very slight change to the dimensions; this was to make up for the oversize inductors I planned to use in the crossover. When using any inductor with a magnetic core it can suffer saturation under heavy load, the only way to reduce this is either by using larger inductors or air cored ones. However, air core inductors have increased resistance so this has to be factored in to the design. I've been down the air cored road, and for me it didn't end well, I ended up replacing them with very high quality Ferron ones.
ESA Clarity capacitors are used in both the woofer and tweeter circuits. I used neotech cables in all internal wiring and very high quality rear connectors. The drive units were purchased from Falcon Acoustics seas range as they had most of the parts in stock. For resistors the 4.7ohm resistors are M-Resist resistors and the 3.3ohm in the tweeters singal path is a Mills 12W component. Maybe slight overkill TBH.
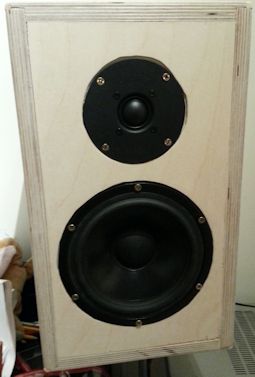
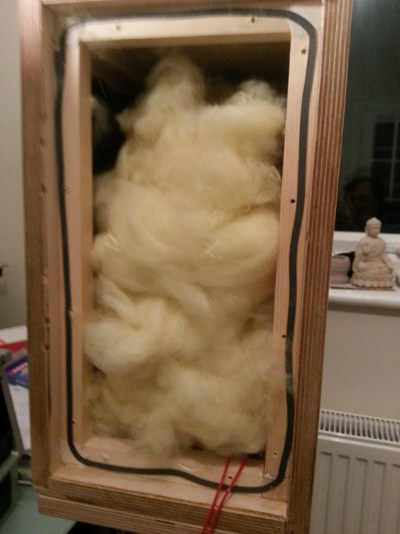
For the cabinets I used highest quality superior grade Birch plywood, this is quite hard to get hold of, and you may have to look around a little (normally best to go for a local specialist hardwood supplier). In comparison to WPB (water boil proof and void free) ply it is very expensive but is very dense and makes for a good well damped cabinet (it generally has a lamination every 1.2mm). For the acoustic stuffing I used Elves wool stuffing which apparently turns kinetic energy into heat very efficiently. It is unfortunate that the router slipped slightly while making the tweeter channel, but this was filled and does not affect the sound too much.
Assembling the cabinents - the woodwork
I decided to use rounded corners on each of the sides to avoid any sudden corners: 1 because I have children in the house and they bump into things, 2: because it will sound better anyway not to have sudden edges. However, with plywood you can't just rout or sand a bit of the corner away because it would leave the ply laminations exposed.
 There is a well know wood working technique for this that I stumbled across, and that is to cut a 1/2 inch (12mm) channel into the one edge of the ply as shown in the image on the right. Once the channel is routed, then just use a good wood glue on the joint and make sure you use a batten along the whole length. Be careful not to get glue onto the exterior of the wood, as if you do, its hard to get off before varnishing. This approach will need a good few clamps to keep the wood held in place for several hours!
For the baffle, I cut the wood such that the baffle was flush with the plywood front, as I planned to put grille covers, so the visible plywood edge did not matter. If you want the same look for the baffle as the sides, just repeat what we did above. In any case the baffle edges must be rounded by at least 5mm according to the design specifications. This just followed the design spec exactly.
Lastly the back panel was again mounted flush. There's a couple holes to put in this panel, one for the port, and two small holes for the speaker terminals. Nothing to taxing there. Personally I found some improvement by lining the side walls with fairly thick felt glued in place with PVA.
Left: before spraying, Right after spraying.
Finishing off:
Crossovers were built to spec, following the circuit provided exactly. I used a tag board to assemble it, and this seems to be the de-facto way of building DIY crossovers. Do not put the crossover inductors too close to the main driver, or you may adjust the value of the inductor. I did this on the first attempt, and wondered what was wrong!
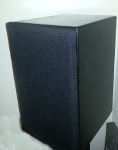
The grille was made from left over plywood, routed to make a thin frame. The edges were rounded off using an edge rounding router bit. Once the frame was ready I used glue gun glue to stick the fabric to the frame. It was a little tricky due to the hot glue, but it worked overall. To hold the grilles to the speakers I used high power magnets, which I purchased from Clas Ohlson. four 10mm Neodyminum magnets work well for this purpose, two in the speaker baffle board, two in the grille. The easiest way to locate the hole that I found, is to clamp the grille in the right place on the baffle, then drill a pilot hole through both. To hold the grill vertically, I put a small plastic spacer between the bottom of the speaker and the stand (see the images below).
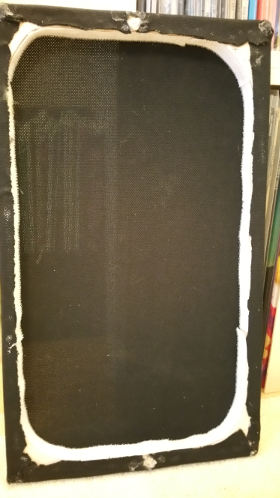
Front Grille.

Other pages within this category
- Building a pair of Troels Gravesen"s Jensen ER speakers
- Building a pair of Seas Mimir design speakers.
- Subwoofer build that got me back into DIY
You'll also find me on:


Also find me here