
Making an arduino board holder from ply & wood
Making a nice case for an Arduino board can range from the simplest possible case, a piece of plywood the right size, with a few holes to mount the board, right through to an intricate box with closing lid etc. This one probably falls in the middle somewhere.
Why another Arduino board holder you ask? Now that my son has taken up the same hobby as me, having started with scratch and a bit of python, he fancies his hand at Arduino. What better reason to build a new case?
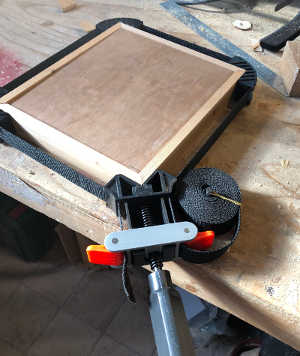
Belt clamps - what a find!
While looking through the ScrewFix (UK) website recently, I found this little gem of a tool that I’ve purchased and used a couple of times now (see photo - left). They refer to it as a “belt clamp” so should be easy to track down should you want one too.
This is an amazing little device for its cost and I cannot speak highly enough of it. I get no payback for listing this, I just think that for cabinet construction this tool is absolutely great. In fact I bought a couple of them as I build speakers and other types of cabinet quite frequently.
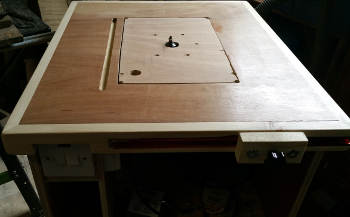
Hand-built router table for the workshop
Over the years, I’ve done my fair share of wood and metal work, including quite a lot of router work. For some tasks, I think a good router table is really needed, so I’ve took a bit of time out from my other projects to build a good router table.
After much looking around, I came up with a hybrid, based partly on this multipurpose table in a youtube video and party on a book I’ve been reading on kindle Complete Guide to Routers by Lonnie Bird. I’m not going to describe the basics of building the table here, the above youtube video will show you all that you need to know, and if you need more, the above book if very good, and covers usage of the tool too.
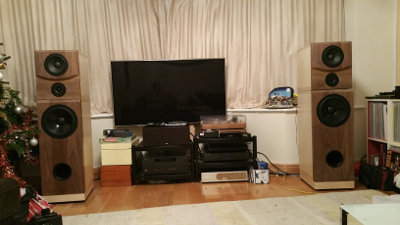
Building a pair of Troels Gravesen"s Jensen ER speakers
Source site fully documenting the build: http://www.troelsgravesen.dk/Jenzen-SEAS-ER.htm
A couple of months ago I built a pair of Jensen ER speakers from Troels Gravesen's website linked above. Given my room size I went for the slightly smaller ported design that is 360mm deep. Now both they and I have had chance to break in I'll write a little about them. In my case usage is about 50-50 audio and AV, and IMHO these speakers are equally at home with both Home Cinema and Music duties. In fact for home cinema, there's really no need for a subwoofer as they go as low as you'd need them to go in most rooms. They produce a very impressive and compelling sound stage in both modes of operation. Dialogue is particularly clear and there's no evidence of excess in any region. Further, the sound is well merged at critical crossover frequencies at all seating positions I've tried in the room.
Polyurethane wood glue for audio equipment.
<img class=" titleimg" alt="pu glue oozing" src="/images/audio/oddsAndEnds/glue-pu-oozing.jpg"/>
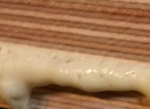
Over the past year or so I've pretty much switched from PVA to Polyurethane glue for most tasks. I've discussed this glue with other wood workers and in my favourite hardwood store SL Hardwoods of Croydon and all seem to agree it is a strong glue.
To me it has one very large advantage for audio equipment over PVA; which is that it expands to fill any gaps. So if the two pieces of wood being stuck together have any imperfections that could allow air through the glue will seal it. See the picture below for how the glue expands enough to ooze out of the sides of a joint. However, unlike normal wood glues, it does not stain and can be sanded out. As this glue expands while curing, it is important that the work is well clamped or held under tension while setting. See the example image or the you tube video linked below.
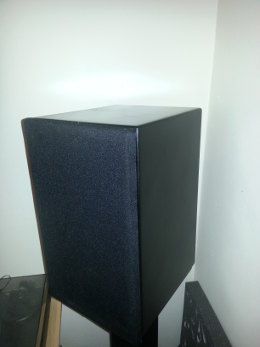
Building a pair of Seas Mimir design speakers.
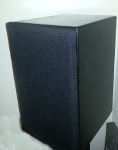 For some time now, I've been running a pair of high quality bookshelf speakers based on the Seas Mimir design. Apparently, they are named after the Nordic god of Wisdom and Knowledge, I cannot disagree and with each listening I like them more and more. I've run them off both Roksan and Arcam amplification and I've really liked the sound from each.
Many people think that when building speakers, the most important thing is the drive unit, but there are many concerns: the quality of the crossovers, the cabinet construction and the stuffing used. Moreover, the stands they sit on and the position in the room that they are placed play a huge role too. In addition to this, the acoustics of the room play further into the equation. Over the parts of this article, I'll discuss the choices I made and my rationale for those choices.

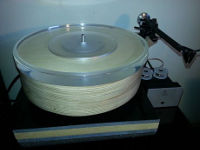
Orbit, a high performance DIY turntable.
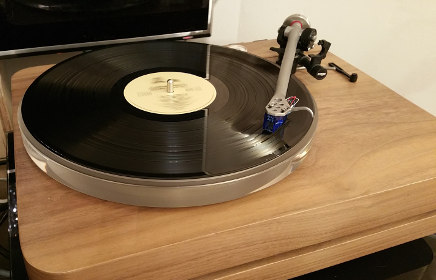 Orbit is a high performance DIY turntable based on Rega 24V decks. It's very easy to make using a
moderately well stocked home workshop. In my opinion it competes well with decks costing a lot more
than its sum of parts. It uses a fairly conventional design so that it is easy to fit the original
Rega lid back onto it, this is important as a lid protects the fragile stylus when not in use and
prevents dust reaching the deck.
Orbit is a high performance DIY turntable based on Rega 24V decks. It's very easy to make using a
moderately well stocked home workshop. In my opinion it competes well with decks costing a lot more
than its sum of parts. It uses a fairly conventional design so that it is easy to fit the original
Rega lid back onto it, this is important as a lid protects the fragile stylus when not in use and
prevents dust reaching the deck.
What I really like about Rega decks is that they are very easy to upgrade. In fact there is no need to perform all upgrades in one go, one can start with the TT PSU, then the platter and sub-platter and so on. This means a high performing deck can be purchased slowly in steps. In fact my first attempt at building a turntable involved a series of ISOKinetik modifications on a P3/24 turntable.
Turntable building - the history
<img class=" titleimg" alt="original TT" src="/images/audio/turntable/tt-complete1.jpg"/>
Before my most recent turntable build, I had tried a couple of earlier designs. The first of which was a Rega deck with a couple of IsoKinetik modifications. I've gone a long long way since this, but I keep it here for historic purposes.
Starting out with a P3-24 deck.
My deck started life as a refurbished P3-24 unit, with no mods made to it. Firstly, after much reading I purchased the TT motor control unit; which is available from many retailers at reasonable cost. It should be said that this is one of the easiest and most effective upgrades that you can me, and I would not do any other jobs without first using the TT motor control unit.
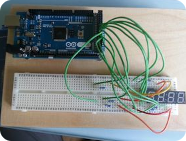
Building a holder for my Arduino board
<img class=" titleimg" alt="complete arduino holder" src="/images/electronics/arduino/holder/board-assembled.jpg"/>
After almost shorting out my Arduino with a piece of wire that was left under the circuit board, I decided it was time to mount it onto a proper support board along with the breadboard I often use with it.
Okay I could go out and buy one, but I had a nice piece of high grade birch plywood in the garage (left over from building a pair of speakers). A little bit of cutting, sanding and varnishing later I ended up with a nice board to mount the arduino on.

