I recently bought a Heltek Wifi kit 8 and noticed that although the board itself seems to be a good board the pin-outs, both online and on the silk screen of the board are wrongly specified. For example the silk screen shows SDA and SCL on non standard pins, but this is not the case as far as I can tell. To get this information, I’ve followed the schematic then proven these findings with in circuit testing to prove it.
Disclaimer, the below pin-out guide was obtained from the schematics. It’s possible this diagram is still incomplete or wrong. The only thing I can say is that the lines I have tested follow the below layout.
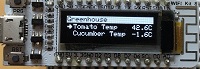
I bought this board because it looked like an excellent choice for running the tcMenu IoT solution given it’s inbuilt WiFi and OLED display, so I wanted to ensure it was tested and working (which it now is).
Pin-Outs for WiFi Kit 8 based on schematics
              WIFI Kit 8
            USB Connector
    GND 0                   0 GND
    Vin 1                   1 Vin
    3.3 2                   2 3.3
    GND 3                   3 GND
  GPIO4 4 SDA               4 CTS
  GPIO0 5                   5 DTR
 GPIO15 6               SCL 6 GPIO5
 GPIO13 7                   7 TXD
 GPIO12 8                   8 RXD
 GPIO14 9                   9 NRST
 GPIO16 10 OLEDRST         10 GPIO2
     A0 11                 11 EN
Generally for ESP8266, Arduino pin numbers directly follow the GPIO numbers. Most importantly, the Wire library should be configured without overriding pin numbers, contrary to the writing on the board, the i2c pins are on the default arrangements.
If you are trying to get the built in OLED working, do not override the default I2C pins. See the pin out diagram above and the below example.
Example OLED sketch for Heltek Wifi Kit 8
// This simple sketch shows how to use the OLED display with the Adafruit_GFX
// library using the SSD1306 driver on the Heltek Wifi Kit 8

#include <Adafruit_GFX.h>
#include <Adafruit_SSD1306.h>

// Create the display variable
// Do not adjust the pins that wire uses.
Adafruit_SSD1306 gfx(128, 32, &Wire, 16);

void setup() {
  // put your setup code here, to run once:
    Serial.begin(115200);

    // start up the display.
    if(!gfx.begin(SSD1306_SWITCHCAPVCC, 0x3c)) {
        Serial.println("Display not allocated - check connections");
        for(;;) yield();
    }
    // clear and then draw a title at the top
    gfx.clearDisplay();
    gfx.setTextColor(WHITE);
    gfx.setCursor(1,1);
    gfx.print("OLED display");
    gfx.display();  // this actually updates the display
}

void loop() {
    // in a loop print the number of milliseconds.
    gfx.fillRect(0, 16, 128, 16, BLACK);
    gfx.setCursor(1, 16);
    gfx.print(millis());
    gfx.display();  // this actually updates the display
    delay(250);
}
If you have any more information about this board, or would like to improve or correct my analysis, please comment below.
Other pages within this category
- Heltek Wifi kit 8 pin outs marked wrongly on some silk screens
- Arduino digital input and output tutorial
- IO abstraction: the same code for pins, shift registers and i2c IO
- Working with and de-bouncing switches for Arduino
You'll also find me on:


Also find me here