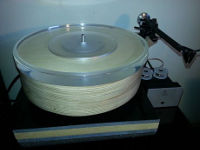
Things learnt from building the first turntable.
<img class=" titleimg" alt="" src="/images/audio/turntable/tt-complete2.jpg"/>
Although my first turntable prototype worked quite well, it had a few issues, each of these is looked at here:
- The area under the platter was too thin, and tended to concentrate vibration around the platter main bearing sleeve. This was fixed by brute force to avoid vibration in the first place (a very large granite / MDF block below the plinth).
- The positioning of the motor and circuit led to some noise, and only earthing to motor prevented it.
- It left the stylus too exposed, and because of its design could not easily be covered with a lid. This turned out to be the biggest weak point! While trying to clean under the turntable I caught the duster on the stylus. This led to the demise of an Ortofon 2M black stylus; which at £300 led me to rethink the design.
So in summary:
Turntable building - the history
<img class=" titleimg" alt="original TT" src="/images/audio/turntable/tt-complete1.jpg"/>
Before my most recent turntable build, I had tried a couple of earlier designs. The first of which was a Rega deck with a couple of IsoKinetik modifications. I've gone a long long way since this, but I keep it here for historic purposes.
Starting out with a P3-24 deck.
My deck started life as a refurbished P3-24 unit, with no mods made to it. Firstly, after much reading I purchased the TT motor control unit; which is available from many retailers at reasonable cost. It should be said that this is one of the easiest and most effective upgrades that you can me, and I would not do any other jobs without first using the TT motor control unit.

