Having built several speaker set-ups and amplifiers when I was younger I had got out of the hobby for quite a number of years. However, this build was back in about 2011 and since then I've built a few much better units. However, this is still kept here for completeness.
Why I hold this view? In a small room I think it can be difficult to get the right balance between mid to high frequency staging and concentrating the low frequency response near the user. Further, in the office I can hide the sub under the desk and just angle it about right for good LF response. This was a prototype, to test the water as it were, and for a while it did a commendable job.
So I recall from speaker building books that an effective way to focus a speakers response at low freqencies is to put it in fourth order bandpass. Sounds fancy, but what it means is that it is a natural notch filter. I took my calculations for this project from the DIY subwoofers 4th order page. From these calculations I wrote a Scala program that provided me with the length of the pipe and the enclosure size. I found the resonant frequency of the speaker with a free Java signal generator program. Just connect the unbaffled speaker to an amp and slowly increase the frequency until it reaches greatest resonance. I guessed Q at 0.5.
Along with the old Technics speakers, I had some old off-cuts of 18mm ply in the garage, so I had everything needed to do the job as I also had a few meters of high quality Cambridge audio silver coated cable too.
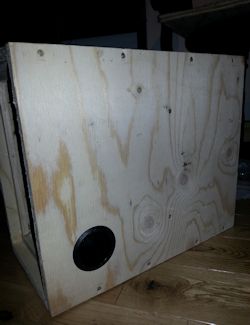
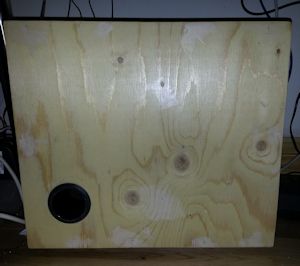
Once the dimensions were clear from the above site, I got cutting to build the enclosure that you can see to the right. From the images you'll see that it is screwed at each corner, and then a thin baton is glued into each corner. I find this baton helps to prevent air leakage and increases box strength. Once construction was complete I sealed all internal corners with silicone sealant. Nasty stuff, but creates a good seal. Cutting out the speakers holes was done with a jigsaw, although I wish I took a bit more time and used a router, as then I could have made the baffles flush.
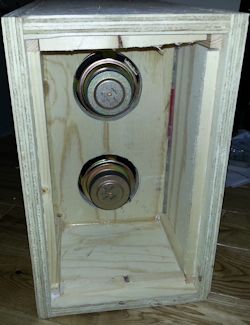


The two speakers were then put into place with a little silicone sealant and screwed in. The last job was to let it all dry and wire it up. Because each speaker had an impedance of 6ohms, I decided it was best to wire in series, as I don't want my amp driving a 3 ohm load that may drop below that at some frequencies!
For me, no speaker, not even a sub should sit direct on the floor. So following the nature of the rest of this build I had some old rubber caps, that are normally used in the UK for outdoor electrical fittings, I filled the hollow inner full of silicone and stuck one into each corner at the bottom.
After filling in with some wood filler around the holes and a bit of sanding, it looked respectable. And for a grand total outlay of 0GBP I built a temporary sub-woofer until I upgrade the rest of the system. It sounds respectable enough considering it was built in 2 days from left overs.
Other pages within this category
- Building a pair of Troels Gravesen"s Jensen ER speakers
- Building a pair of Seas Mimir design speakers.
- Subwoofer build that got me back into DIY
You'll also find me on:


Also find me here