Using a matrix keyboard with TcMenu is straightforward, we use the IoAbstraction Keyboard Manager component to handle the keyboard, along with a custom listener for tcMenu that feeds the menu manager with appropriate events upon key presses. This library allows you to connect your keyboard either using Arduino pins, or any supported IoAbstraction such as the I2C PCF8574 or MCP23017.
Setting up the menu sketch for a Matrix Keyboard
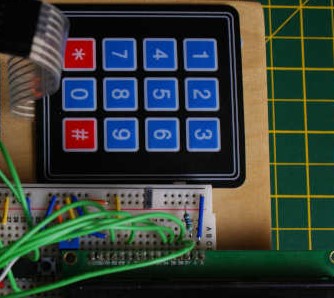
Before proceeding, it is recommended that you wire up your keyboard in accordance with the above linked keyboard manager page and any documentation that came with the keyboard. Before proceeding, fully test the keyboard using the packaged IoAbstraction example sketch.
Once tested you can either set up the matrix keyboard automatically using tcMenu Designer, or manually if you need custom control over how it is set up.
Setting up a matrix keyboard automatically
From code generator window click on the input plugin and select the following:
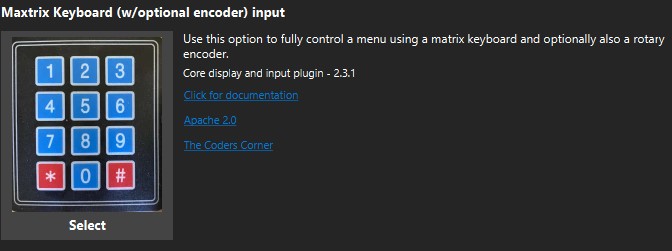
Matrix Keyboard selection in Code Generator
Once selected the plugin will give various options, you can choose if you want the keyboard support along with a rotary encoder. We’ll now discuss the various configuration options:
Next and Back character on keyboard
These two character codes will be used to simulate next and back, giving a similar feel to up/down buttons. They can be set to -1 for none.
Enter and Del character on keyboard
These are mandatory, the “enter” key simulates activating editing and moving into sub menus etc. The del key resets to previous menus and holding it goes back to root.
Keyboard layout
Defines the arrangement of keys in relation to rows and columns. There are a few standard layouts that the designer supports, choose the layout for your keyboard.
Matrix row and column pins
These must be defined, they are the pins on which the rows and columns are connected, and the row pins MUST be output capable. If you use interrupt mode, the column pins must be capable of raising interrupts, as there will be no polling.
IoAbstractionRef for matrix keyboard
Here you can indicate that the wires from the keyboard are connected directly to device pins, or are wired through an I2C device, or other supported type of extended device.
Time before repeat key, repeat key interval
These define the time before repeat key starts, and then the interval between each repeat. These values are specified in milliseconds.
Keyboard uses interrupt
If set to true, the keyboard manager will not poll, and will rely on any change in the button state raising an interrupt. Therefore, the column pins must be able to raise CHANGE interrupts. Without this option, the class will poll every 50 milliseconds for changes.
Automatic Rotary encoder configuration
It is possible to set up a rotary encoder alongside the keyboard support, to do this simply enable the rotary encoder by ticking “Rotary encoder needed”. Once enabled, the properties for the encoder will be enabled.
Encoder A, B and Select pins
Here we define the pins on which the encoder is connected, for the A and B pins and also the center button (select). Depending on wire length, no external pull-ups may be needed.
IoAbstractionRef for switches/encoder
Here you can indicate that the wires from the encoder are connected directly to device pins, or are wired through an I2C device, or other supported type of extended device.
Polling or Interrupt mode
The switches class controls all encoders and buttons not on the keyboard, it can either poll or use interrupts, here you can define that.
Type of encoder
There are many types of encoder, most of the cheap encoders I use for testing are full cycle, and I’ve made that the default. However, if your encoder is otherwise, select the other option.
Setting up a matrix keyboard manually
Include the required header at the top of your sketch:
#include <tcMenuKeyboard.h>
Globally declare the variables required at the top of the sketch:
// Either manually declare a keyboard layout or use one of the standard ones.
MAKE_KEYBOARD_LAYOUT_3X4(keyboardLayout)
// or MAKE_KEYBOARD_LAYOUT_4X4(keyboardLayout)

// Now declare the keyboard manager
MatrixKeyboardManager keyboard;

// Lastly, we declare the tcMenu keyboard listener, that listens to keypresses
// and performs the right actions in the menu. If this one doesn't do the right
// thing, you can write your own / extend this one.
MenuEditingKeyListener menuKeyListener;
Then create a setupKeyboard function that will initialise the keyboard:
void setupKeyboard() {
    // set up the pin mappings for the rows and columns.
    keyboardLayout.setRowPin(0, 22);
    keyboardLayout.setRowPin(1, 23);
    keyboardLayout.setRowPin(2, 24);
    keyboardLayout.setRowPin(3, 25);
    keyboardLayout.setColPin(0, 26);
    keyboardLayout.setColPin(1, 27);
    keyboardLayout.setColPin(2, 28);

    // initialise telling the library it's wired on Arduino pins, with given layout
    // and listener, you could change the IOdevice to an I2C one for example.
    keyboard.initialise(ioUsingArduino(), &keyboardLayout, &menuKeyListener);
    //keyboard.initialise(ioUsingArduino(), &keyboardLayout, &menuKeyListener, interruptMode);

    // repeat the pressed key after 850ms every 350ms
    keyboard.setRepeatKeyMillis(850, 350);
}
Then at the end of setup, call the function you created above:
void setup() {
    // ... your other setup stuff ...

    setupKeyboard();
}
That’s it, your menu will be controllable by the keyboard. We’ll now discuss how it works:
How key presses work when not editing
- Holding down (long press) ‘#’ at any time will go back to the root menu.
- When not editing pressing 1 thru 9 will make the menu item at that position active (0 acts as goto item 10).
- Pressing ‘*’ while not in edit mode will enter edit mode for the active item, if the item is a sub menu, the sub menu will be activated.
- Pressing ‘*’ on an action item will trigger it.
- If you have a 4x4 keyboard, then the A and B keys can be used as next and back, acting somewhat like a rotary encoder on menu selection and some edit items.
How key presses work when editing
- For non-text fields: Pressing ‘*’ while in edit mode will leave edit mode
- For text fields, Each key you press is added to the text field, like a regular editor.
- For Enums, pressing 1 thru 9 on an enum selects the options in order as if it were 1 based.
- For Booleans, pressing ‘*’ on a boolean toggles it’s state.
For entering numeric values
- It is best to avoid non-decimal numeric values and values that do not start at 0 (IE have no offset). Although others work, they are not intuitive on a keyboard.
- Editing a numeric field zeros the value, a new value is entered using 0-9 keys, starting with units, then tens and so on.
- If the field supports negative values, press either ‘#’ or ‘-’ to negate the current value.
- Number editor starts allowing editing of the whole number, pressing ‘’ to edit the fraction (if available), then pressing ‘’ to exit editing.
- For IPAddress, Large numbers and time fields: as per integer editing, but ‘*’ moves between each part.
Other pages within this category
- TcMenu - Overview and quick start
- Multi language locale based menu for Arduino and mbed
- Embedded Java for Raspberry PI and other embedded Linux
- Setting up IO-expanders in the menu designer
- Integrating EEPROM support into menu applications
- Securing sub-menus and remote connections with an Authenticator
- Taking over the display from a renderer
- MenuManager and menu iteration
- Rendering menus to TFT, LCD and OLED using tcMenu
- Menu control using a matrix keyboard
- TcMenu Designer UI - worked example
- Working with Menu Item types in tcMenu
- Working with menu structures using the CLI
- Creating and using Bitmaps and Title Widgets in your menu
- Code Generator and Plugins guide
You'll also find me on:

